Profiles - General Profile Guides - Explaining User Profile - Objective
Objective
 This article will explain the User Profile in Rxgreenthumb Social, what it is, and how it works, as well as explaining some common misunderstandings when it comes to the relationship between the Joomla and Rxgreenthumb Social User. Kindly read the documentation carefully and contact us via support channel if there is any issue.
What is the User Profile?
Joomla is a very powerful CMS system, but when it comes to extending the user object, it is not very good solution to use. In the latest versions of Joomla, some effort is put into enhancing the user object with custom fields you can set using the built-in User - Profile plugin that is shipped with Joomla 2.5 and above; however, that is definitely inadequate for the needs of a user profile in a social network.
This is where the native Joomla profile manager will stop and the new profile manager, Rxgreenthumb's Social Profile, will begin. For this transfer of control to occur, the Joomla User - Profile plugin must be disabled.
What Can I Do with User Profiles?
Rxgreenthumb Social User Profiles can do many things that cannot be done with the native Joomla user profile. User profiles are at the core of a social network environment, so within your profile, you will be able to:
- See other profiles.
- Add friends to your network.
- Send private messages-chat to other people in your network.
- Upload video and photo galleries for others to view or to view others’ video and photo galleries.
- Control the privacy of your profile or block others.
- Have different sets of Custom Profile Fields for your profile.
- Delete the profile data if needed.
Common Misconception
A very common misconception is that once Rxgreenthumb Social is installed, it somehow creates its own user. More often than not, you will hear people asking questions similar to, "Will my Joomla Users work with Rxgreenthumb's Users?"
On a Joomla site, there is no such thing as "component user." Not only with Rxgreenthumb Social, but with 99% of the known extensions in JED. At this time, we are only aware of one single component with its own user; however, if you already using Rxgreenthumb Social, there will probably be absolutely no need to use it.
How This Works in Practice
It actually works very well because it allows multiple components to share a single user across the entire site.
How Rxgreenthumb Social Implements This
When a user is created, it is stored in the Joomla Users' database. All mandatory fields such as Name, Username, Email, and Password, are stored in Joomla #__users table
Rxgreenthumb Social then uses that information and adds Custom Profile Fields, Friends System, Private Messaging, Photo and Video Galleries, etc.; however, Rxgreenthumb Social will never:
- Control the session of the user.
- Handle the logins/logouts or activations.
- Manage passwords resets.
- It will NOT handle any registration emails. It will, however, provide HTML template for those.
- All that is strictly handled by Joomla itself.
Creating Profiles
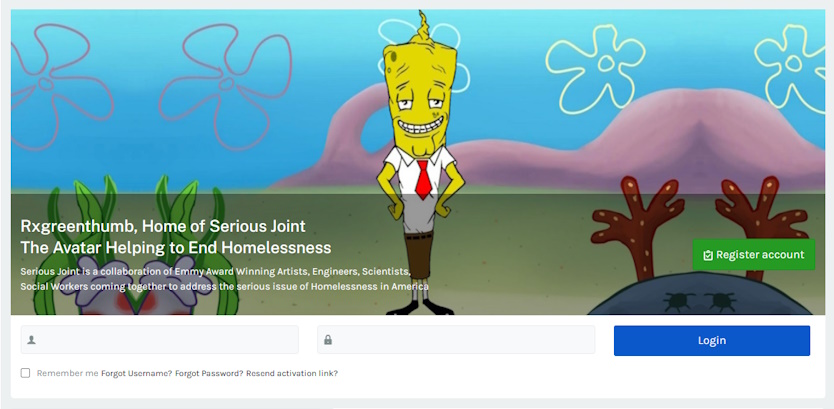
Navigate to the Rxgreenthumb Homepage and click the green Register account, Its Free!
Inputting the User Information
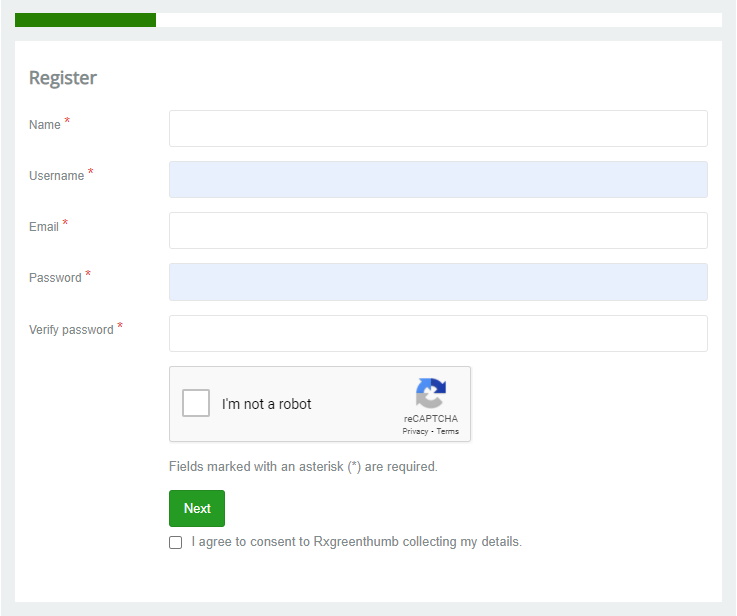
The very first screen of the Rxgreenthumb registration flow is actually handled by Joomla. This might sound strange because the registration occurs through the Rxgreenthumb Social form; please read this article to understand this process. You will need to fill in all the fields on this screen in order to proceed further.
ReCaptcha
Answer the ReCaptcha challenge, it will show up on this screen.
Note: Be aware that the Rxgreenthumb User Object is still not created. It is only created after the registration flow has been completed.
Click Next to proceed
Select User Profile Type
This is the step of the registration where the actual Rxgreenthumb User Profile is created. by default a Default User selection is provided which will allow the user to fully register and activate their account via email activation link sent to the email provided.
All other User Types require verification of some sort and are reserved for our minted NFTs.
Select Default User

Select the required information and click Next.
Note: All NFTs are entered by Rxgreenthumb staff.
See Verification process for further information.
Basic Information
All of the information with asterisks need to be provided. If some of the information is not provided, Rxgreenthumb Social will notify users that errors must be corrected before proceeding.
Click Register to proceed
Uploading an Avatar
This is the last step of the Rxgreenthumb Social registration flow. Avatar upload is not mandatory and you can either Skip it or Select file... from your computer and then select Upload
![]()
Click Next to complete registration.
Note: Click on provided link in the email sent to the email address provided. Once activated you can login and begin to participate.

Profile Preferences
Profile Preferences are accessed through the Toolbar navigation from the Profile tab.
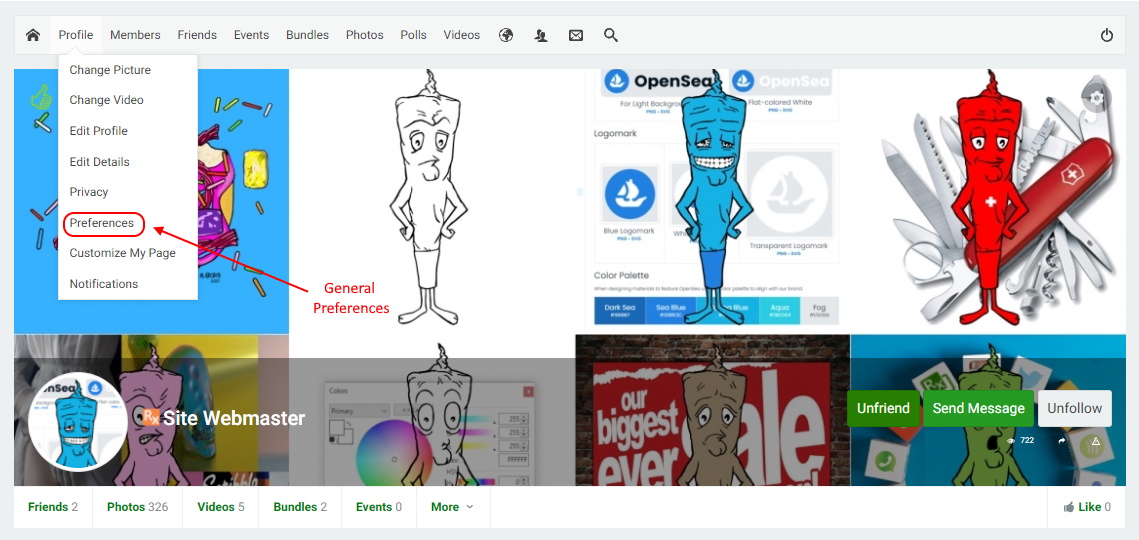
General Preferences
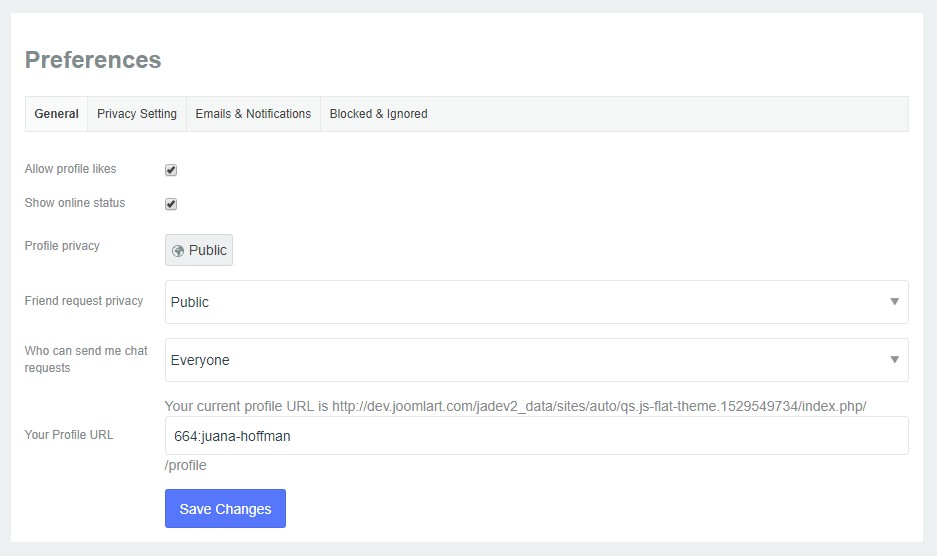
General preferences may be set by going to the home page and select the Preferences link in toolbar navigation. This page will allow you to set:
- Profile Likes - Select whether profile visitors will be able to Like profile
- Show online Status - Who can see you online.
- Profile privacy - Who can see the profile
- Friend Request Privacy - Who can send you friend request.
- Your profile URL - Only if native Joomla SEF is enabled will users be able to choose their unique profile URL.
- Who can send me chat request - Sets who will be able to send you chat messages.
Privacy Settings
Privacy Settings will allow the user to control various privacy settings in the user's profile. These options are:
- Friends - Control who will be able to see the friends of user.
- Photos - Determine who will be able to see user’s albums and all of the photos in it. Remember, this is actually the entire album privacy option; photos inherit the privacy of the album. You can also apply the same setting to all albums.
- Videos - Govern who will be able to see videos of user.
- My groups list - Sets who will be able to see the groups list of user. This option will only control the groups list on profile.

Emails and Notifications
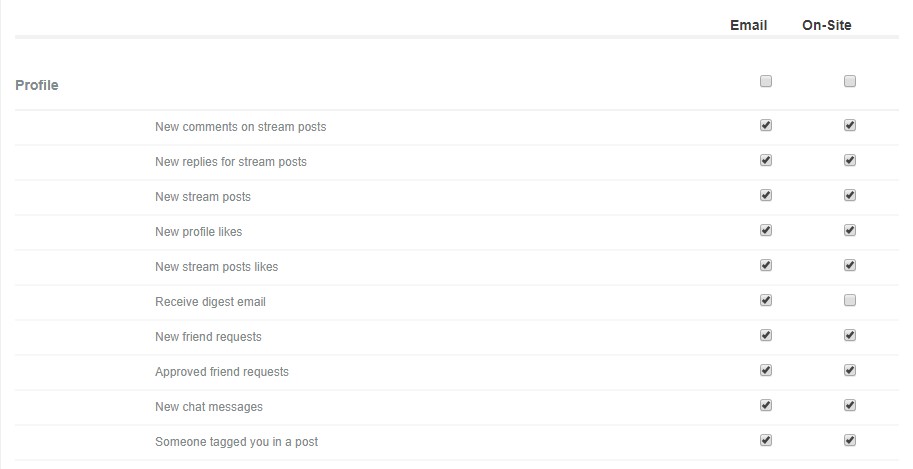
Settings here allow the user to specify the user's own preferences regarding the kind of notifications that would be generated for the individual profile and overriding the defaults set in the site's Backend. There are two types of notifications which users can control. Email notifications are those sent by email, while the On-Site notification generates alerts in the Toolbar's general notification action.
Blocklist User
It's a simple list of all users who are blocked by the profile owner.
Karma System
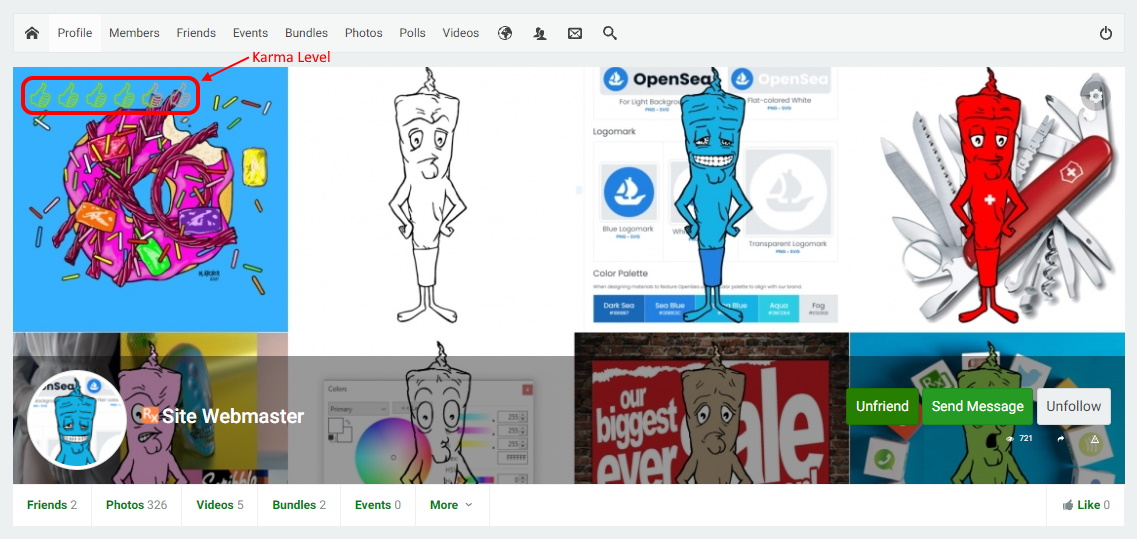
In Rxgreenthumb Social, Karma is used as user badges were used in Rxgreenthumb 1.0. It shows how active a user is in Rxgreenthumb Social. Karma will only be activated when a user has uploaded a photo in the user's profile or do other activity Based on the user point the user will get karma on his profile page. Otherwise, the user will never achieve any badges. In Rxgreenthumb 4.5 The name is used as Badges, you can add new badge as well via admin panel.
This is how it looks like on Frontend after User has acquired a certain amount of Karma.
 Friends System
This system allows users to add other users to their Friends List. This is action must be approved by BOTH the requester and the recipient of the request. The Friends system also allows the user to invite, by email, the user's friends who are not already in the network, or to search for friends in the network by any custom profile field that is set as searchable.
Overview
Searching for friends or new people has never been easier. JomSocial allows you two (2) types of search: a simple, fast search if you know exactly who you want to find or an advanced search where the user can use multiple search criteria based on Custom Profile Fields. Both search options are enabled by default and cannot be disabled in any configuration option.
Simple, Fast Search
If you know the exact name or username of the person you are looking for, you can simply write it in the quick search box on the community's Frontpage.
NOTE: The Social User Menu only available to logged in Users.
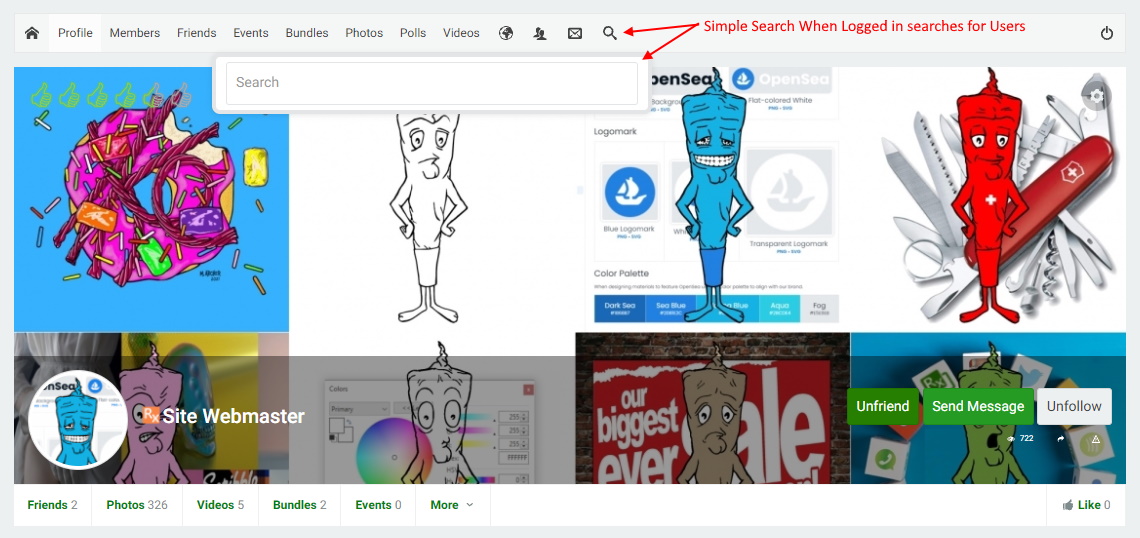
You can also access the quick search option from any Friends-related page, where you will have an additional option to search only users who have uploaded avatars.
Advanced Search
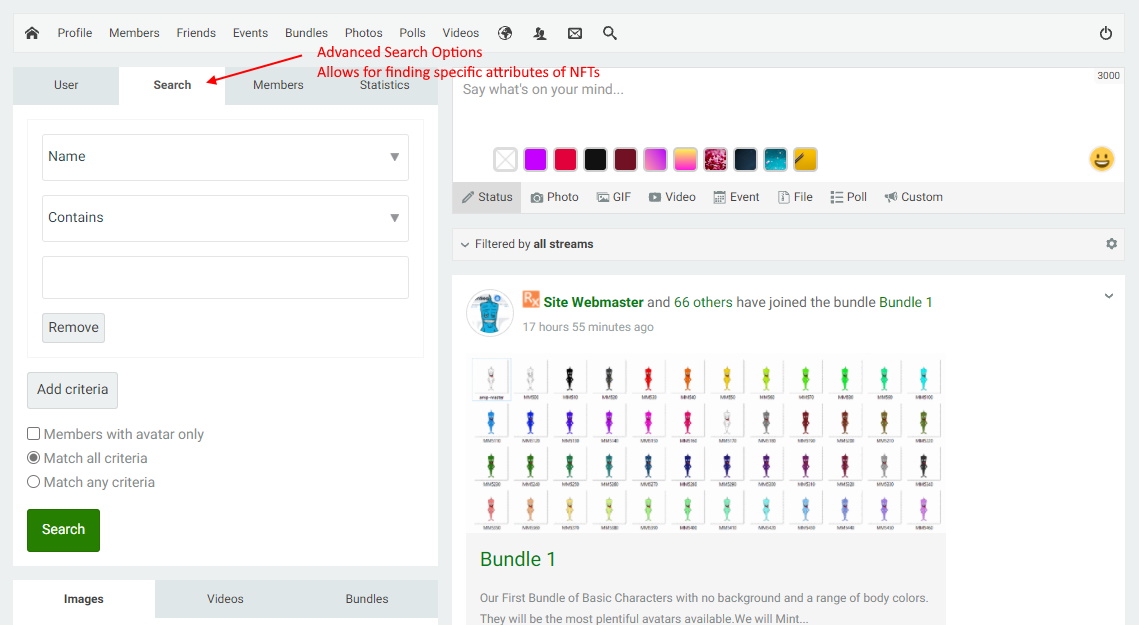
Unlike the Simple Search, the Advanced Search allows the user to create criteria for searching based on the custom profile fields values. Every field that is set as searchable in the custom profile fields configuration will be available in Advanced Search.
Add Friends
Overview
One of the most basic purposes of a social network is adding friends. JomSocial allows everyone to easily add friends from multiple locations on the site; however, every add action should be mutual and approved by the added person before the two become friends on site.
Adding from the Profile Page
The most common way to add a friend is to visit his/her profile page and find the Add as friend button.
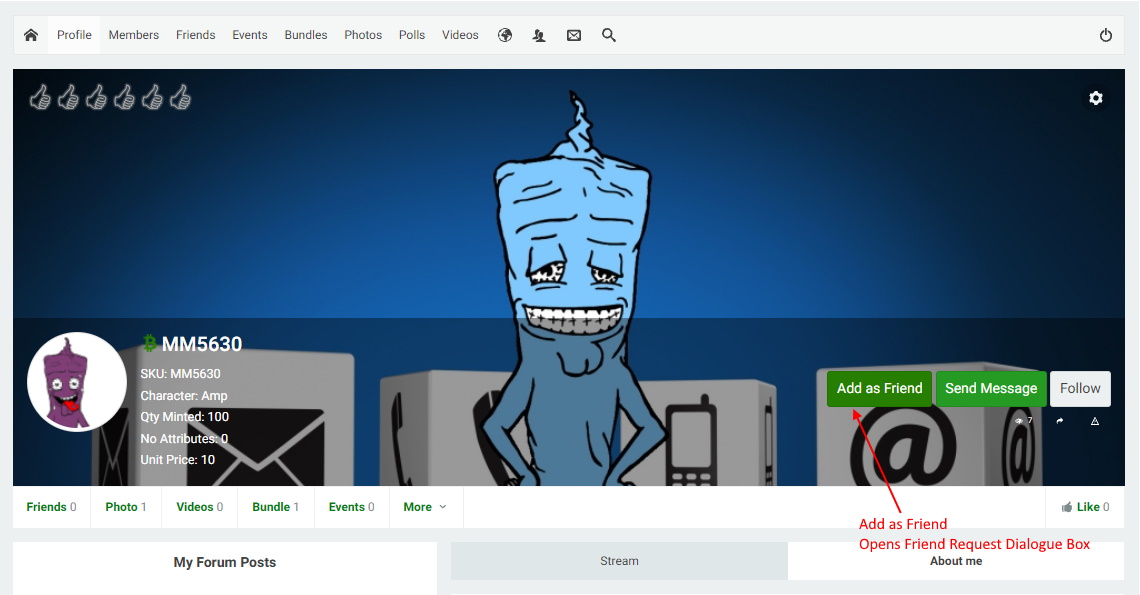
If the user set the Profile Privacy to be Friends you will see the page like this:
A new popup will show up. In this popup, there will be a text field in which you can write a custom message. This message is by default set to, "Hi, I'd like to add you as friend." and will be sent as a custom message if the user doesn't change it. There are also options to confirm adding the friend or canceling entire process.
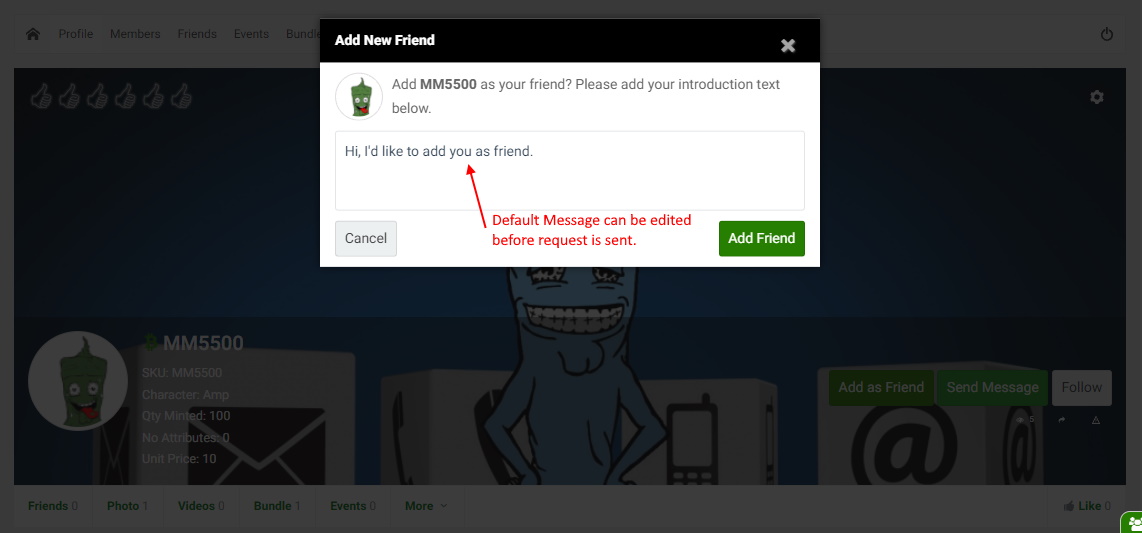
After clicking Add as friend, a new popup will show up. In this popup, there will be a text field in which you can write a custom message. This message is by default set to, "Hi, I'd like to add you as friend." and will be sent as a custom message if the user doesn't change it. There are also options to confirm adding the friend or canceling entire process.


